Monday, May 28, 2012

Ring Around High Cholesterol

One of the side effects of having a big garden is that you can only eat so much stuff, and therefore you have to preserve things for when the sight of another cucumber-tomato salad doesn't make you want to vomit. So you freeze what you can (this is annoyingly little, really), and then you make jam with or pickle the rest. And then a year later you STILL have gallons of gallons of pickle spears in your basement. But this is not a cautionary tale! 

We decided to try and use some of them up after seeing Alton Brown make fried pickles on Good Eats (my 9-year-old is a big fan!). Alton's recipe is here, and it worked really well. So well that there are no pictures to show for it! But I decided to use the same approach - that of buttermilk vs. a more traditional egg wash - to tackle something else that has always eluded me: onion rings.

But pickles, you see, pack a lot of flavor on their own, whereas onions need a bit more help. Here's what I did:

Ingredients

1 cup buttermilk
2 cups yellow corn meal
2 tsp. salt
1/2 tsp. cayenne
1 tsp. garlic powder
1 tsp. onion powder

2 onions, sliced thinly into rings
anything else you want to batter and fry, I used some asparagus from the garden and some tomato slices.

oil for frying

Let's do this!

Heat your oil before you begin, aiming for about 350 degrees. I'd love to have an electric fryer with a thermostat to handle this for me, but if I did, I'd probably fry way more food than anyone ought to. What I have instead is an icky anodized aluminum pot that I only use for frying. 

She ain't pretty, but she gets the job done. 
The Calphalon marketing team will surely cringe if they ever catch sight of that photo. But it's their own faults for selling it to me as "just as easy to clean as non-stick!". It's not. 

While the oil is heating, mix all the dry ingredients in one bowl and pour the buttermilk into another. Once it's hot enough, dip an onion into the buttermilk, then into the cornmeal mixture, then into the buttermilk again, back into the cornmeal, then plop it into the pot. Carefully!


Cook it until it's browned, flipping them over with tongs or a spider as needed. Remove and drain on paper towels (or "paper toweling" as Martha Stewart used to inexplicably say)  while you work through the rest. Mine didn't come out looking anywhere close to perfect, but they did look and taste better than most other home made onion ring attempts I've tried over the years.  

I served them with home made ranch dressing, and we called it dinner!

What? There's veggies in there... somewhere...


Friday, May 25, 2012

All That Glitters is... Shoes?

Pinterest, oh you. You make me think I can (and should!) do anything, even when I have no objective need ever for glittered shoes. I love how many brilliantly creative people are out there, though, and sometimes you just have to go for it.

So I started with these old shoes that seemed too long in the toes (I like a little toe cleavage in a shoe), and never got much use. All you need is Mod Podge, glitter, and a foam brush.

It seems easy enough, right?

I decided to make it a bit more complicated by taping off the cloth trim and a line up the back, as well as the sole. Just to keep the glitter where glitter ought to be.


Looking better already after pulling off those silly bows.
Full disclosure - I actually got my 9-year-old to do this part.


Apparently, while you can send little boys running in terror just by saying the names of girl colors ("Look! I got you a purple ball to play with!" AHHHHHHHHHH!), if you get out glitter, they will come. They wanted to know what I was doing, why I was doing it, and if they could help. 


So I let them help. It's not slave labor; it's good parenting! Hint: you will need a lot more glitter if you let kids help. Another hint: the kids will be more covered in glitter than the project. 

I mixed up a big glop of Mod Podge with enough glitter to make a pretty chunky paste. Then I dabbed it on with a foam brush to make a light coat. 

Box of rum is optional.


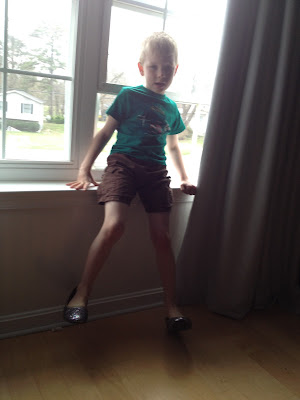
I just kept putting on another coat as soon as the last one started to turn clear, for a total of about 5 coats. Then I removed the tape and let them dry for a couple of days. Jack was all too happy to model them at this point.


I warned you about the magnetism of glitter.

But I wasn't finished yet. I decided to paint the trim that Grey taped over with teal and add a ribbon because again, that weird long toe issue.


Because seriously, these shoes don't already have enough going on...

Annnnnnd, they're done. 

I just didn't like that light blue ribbon, though. It was just too... Cinderella blue. So I picked up a darker teal that was closer to the color of the paint and swapped out the bows. Sent a picture to my brother and he said, "I didn't know WTF came in powdered form now."

MISSION ACCOMPLISHED!


Friday, May 18, 2012

In the beginning...

You know that feeling you have when you start a blog?

Oh, who's going to read this?

No one will find it.

Other people have already done everything I want to do!

You know what quiets those thoughts? Someone turning your blog into the government as supposed evidence of things that were not actually crimes. YEAHGUESSWHATSOMETIMESTHATHAPPENS.

But sometimes a girl has to be the bigger person. Realize that sometimes people are just going to be jerks because they're jerks and there's nothing she can do about it. What she can do is not commit any crimes (duh!), not blog anything personal, and turn the other cheek with the hopes that aforementioned jerks will drop dead soon. Of natural causes, of course.

So here's what I hope will be a space of COMPLETELY LEGAL crafts, fun times with kids, lots of reusing/recycling, and (for me anyway) a lot of fun.